
After a small spring clean it seems we have a teetering pile of out-dated CD's hanging around. It probably stems from our reluctance to toss previously useful belongings away. Does this happen at your house?
You probably have fabric scraps too, huh? Well Sew, Mama, Sew has dubbed October as Scrap Buster Month. If you're looking for ways to empty out your scrap basket, then it's well worth a visit. Today's tutorial is my eco-friendly way of trying to win some shiny new fabric from their wonderful store.
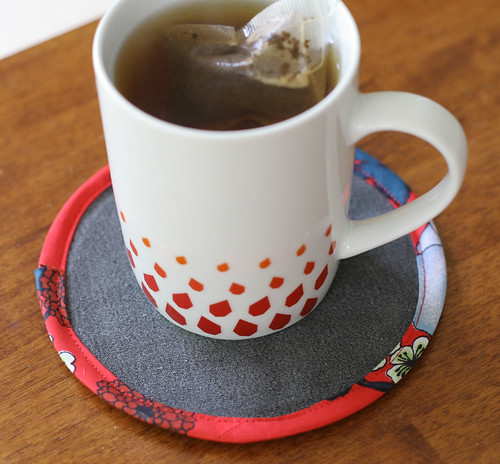
Ingredients (for one coaster):
2 x fabric scraps at least 14 cm square.
enough scraps to make up 55cm of bias binding
1 x unwanted CD
thread
Before you start:
You will need to use a fairly sturdy fabric, as the CD will show through lighter fabrics. I've used denim from an old pair of jeans. Alternatively you could line loosely woven fabrics with plain fabric or interfacing scraps.
Also it is important that when attaching the binding it is close to the CD. Otherwise the CD will slide around and the coaster will be a bit floppy. If necessary, trim the seam allowance down to allow the binding to be up against the enclosed CD.
Step 1:
Lay fabric scraps together with wrong sides together. Cut out a 14 cm diameter circle. To do this I drew around my CD then added a 1 cm seam allowance.
Bias binding:
Cut diagonal strips of fabric 4 cm wide. Join to form at least 55 cm of bias binding. Press binding flat with seams open. Trim off any over hanging corners. Fold strip in half along length and press, to make it 2 cm wide. Open binding out flat again. Fold one long side of strip to center crease and press. Repeat for other side. Fold two sides together along center crease again and press. The binding strip should now be 1 cm wide.
I forgot to photograph making the bias binding. Sorry. If you need more visual instructions then a quick search should help you out.

Step 2:
Place the CD between the two circles, right sides facing out. Pin the two fabric layers together around the CD, enclosing it in the center. Using your sewing machine's zipper foot, baste the circles together around the CD. Make sure the CD is tightly enclosed by stitching as close to the CD as possible.

Step 3:
Pin and then sew binding over the raw edges of the circles. Stitch close to the edge of the binding, which should also be close to the CD. Trim off excess binding, leaving a small overlap and sewing the binding end down over the binding start. Done!

Now you can pour yourself a beverage of your choosing and admire your handiwork!
Please let me know if you have trouble with my newbie tutorial-making skills. I'm happy to help and reword any points that may be confusing.


