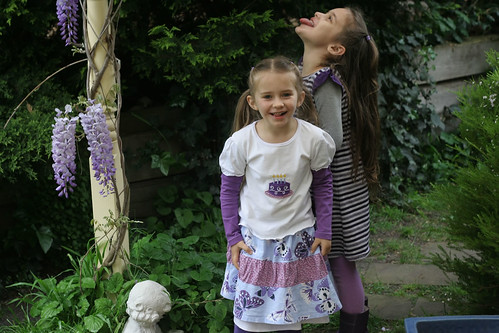
For Audrey's birthday, way back in September, she requested a birthday skirt and t-shirt. The skirt had to use the butterfly fabric she'd picked from Spotlight not long ago. And on the t-shirt she wanted a number four ... no, a cake ... no, a number ... no, a cake with four candles on it.
Fortunately she was more decisive about the skirt. After spying the "Misty" skirt in
Ottobre 1/2008 (#13) her mind was made up. Thank goodness.
It is supposed to have a fitted waistband with side zipper. We're not ready for zippered clothing quite yet. This version has an elasticised waistband instead for ease of self-dressing.
The t-shirt is from Ottobre's basic t-shirt pattern, with bonus puff sleeve added on. I used the puff sleeve pattern from a similar shirt, shirred close to the edge, and sewed it on together with the long sleeve.
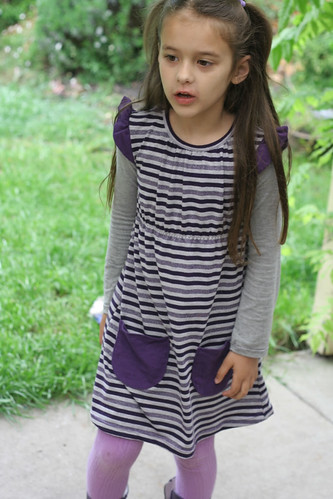
The big girl is modeling the knit dress made using
The Train To Crazy's free dress pattern. This is size 5 and it fits well. I added pockets. Good for carrying things in I thought. Silly me! Little did I know that two hands in low-ish pockets make stretching out and lifting up your dress irresistable! Sigh ....
Instead of the casing inside for elastic, I opted to use a 3-step zigzag to unevenly sew the elastic straight to the inside of the dress.
It's the current favourite for long-sleeve days. The dress has been washed several times already and worn straight off the clothes line.